PRODUCT DESIGN AND MANUFACTURING PROCESS
Shortly, in this period we learned about digital ways of presenting design ideas, pattern making for shoes and how to design a small collection as well as what is entrepreneurship in fashion design.
Principles Of Digital Presentation Technique
In this course we learned how to digitally present our ideas using illustrator and photoshop. Previously, we had been learning how to present our ideas by hand drawing or painting ect. but now we had to do the same with with computers. Here are some of my first work using these digital tools. (Please note that these are my very first practises and therefore not so amazing.)
ILLUSTRATOR

This practice above is a simple shoe that I draw first by hand and then scanned it and moved it to illustrator. After that I turned the picture of the drawing into digitial form and colored it.
The next three practices are drawn with illutrator over a photograph and colored using patterns I made as well as ready made patterns and colors in illustrator.


PHOTOSHOP


In photoshop we practiced turning different pattern ideas we had drawn into digital form so that the pattern is continuous and seamless. Then we tried different patterns on objects such as these shoes.

Our last task was to create these presentation boards with pictures, text and color samples of the products that the board is demostrating. Here are three different presentation boards I made.


Advancing Materials, Design And Manufactoring Techniques
PATTERN MAKING AND PROTOTYPES
In this course we made three different shoe patterns manually, two prototypes and designed one collection for s/s 2020. So, it was a lot but I certainly also learned a great deal.
Patterns for heel
This was the first pattern we made and let me tell you it was a struggle. There just was so many steps and so many different measures to remenber and too many lines going across the white paper. But I made it to the other side and now it doesn't seem half as bad as it did.

1. Covering the last with tape.

2. Taking measures and marking them down onto the tape.

3. Peeling of the tapes and smoothing the halfes on cardboard.

4. Drawing something called the medium copy using the tape copies.

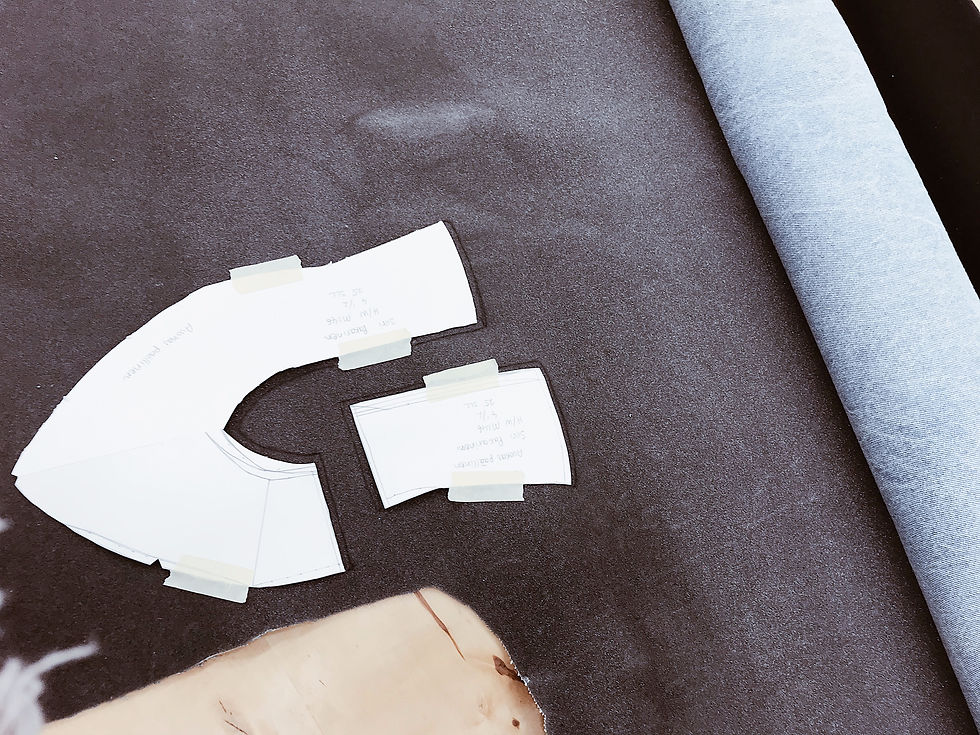
5. Drawing another pattern from the medium copy and marking down lines of the shoe as well as seams and other adjustments on the new pattern. Then finally cutting the patterns for upper shoe and linnig.

Prototypes of the heel
The First Prototype
Materials: Upper and lining – Leftover leather


What went wrong?
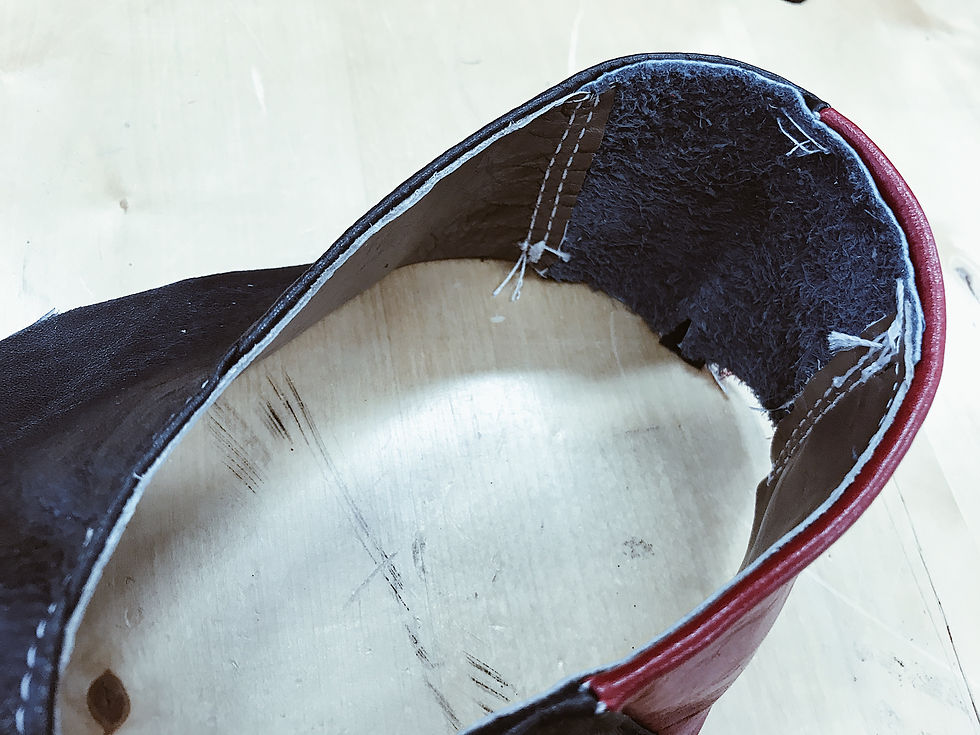
1. The red piece of leather should have been on the other (inner) side of the shoe. This means that I cut the patterns in a wrong way for this last.
2. Because of the wrongly cut patterns some wrinkles appeared on to the upper leahter's heel area.
What was a success?
1. My sewing skills have improved.
2. The patterns that I made for the heel are actually pretty good, because I didn't change or do any alterations in the pattern while making this prototype. Overall, I think it turned out relatively well.

The Second Prototype
Materials: Upper - Foam lined denim
Lining – Synthetic textile


What went wrong?
1. This time I made some changes and alterations to the patterns while cutting them. I added a little extra fabric to the seams and mouth of the shoes because I thought that this way the thicker denim material would be easier to work with and the textile linnig wouldn't start to break up from its edges. These alterations weren't a success. Everything just went crooked and I lost a lot of fabric in the heel...
What was a success?
1. This time I made sure I cut the patterns right for the last and, thankfully, I did manage to do that so that the "red piece" (in the first prototype) went to the right side of the shoe on this second prototype.
2. Even thought I made a lot of mistakes while alterning the patterns I was able to build the shoe so that it looks okay.

Patterns for Oxford
The second shoe type that we made patterns of was men's oxford shoes. By this time I had learned my lessons from the heel patterns and now everything seemed more clear and I found oxford much more easier and stress free.
1. Covering the last with tape.

2. Taking measures and marking them down onto the tape.
3. Peeling of the tapes and smoothing the halfes on cardboard.
4. Drawing the medium copy using the patterns of the tape copies.

5. Drawing another pattern from the medium copy and marking down lines of the shoe as well as seams and other adjustments on the new pattern. Then finally cutting the patterns for upper shoe and linnig.


Patterns for Derby
For some reason this patterns felt once again hard and complicated. It might have been because we made it weeks after oxford patterns and I potentially had forgotten everything. But I made it through and now I have three patterns to try some day.


MOCKUP PRACTICE

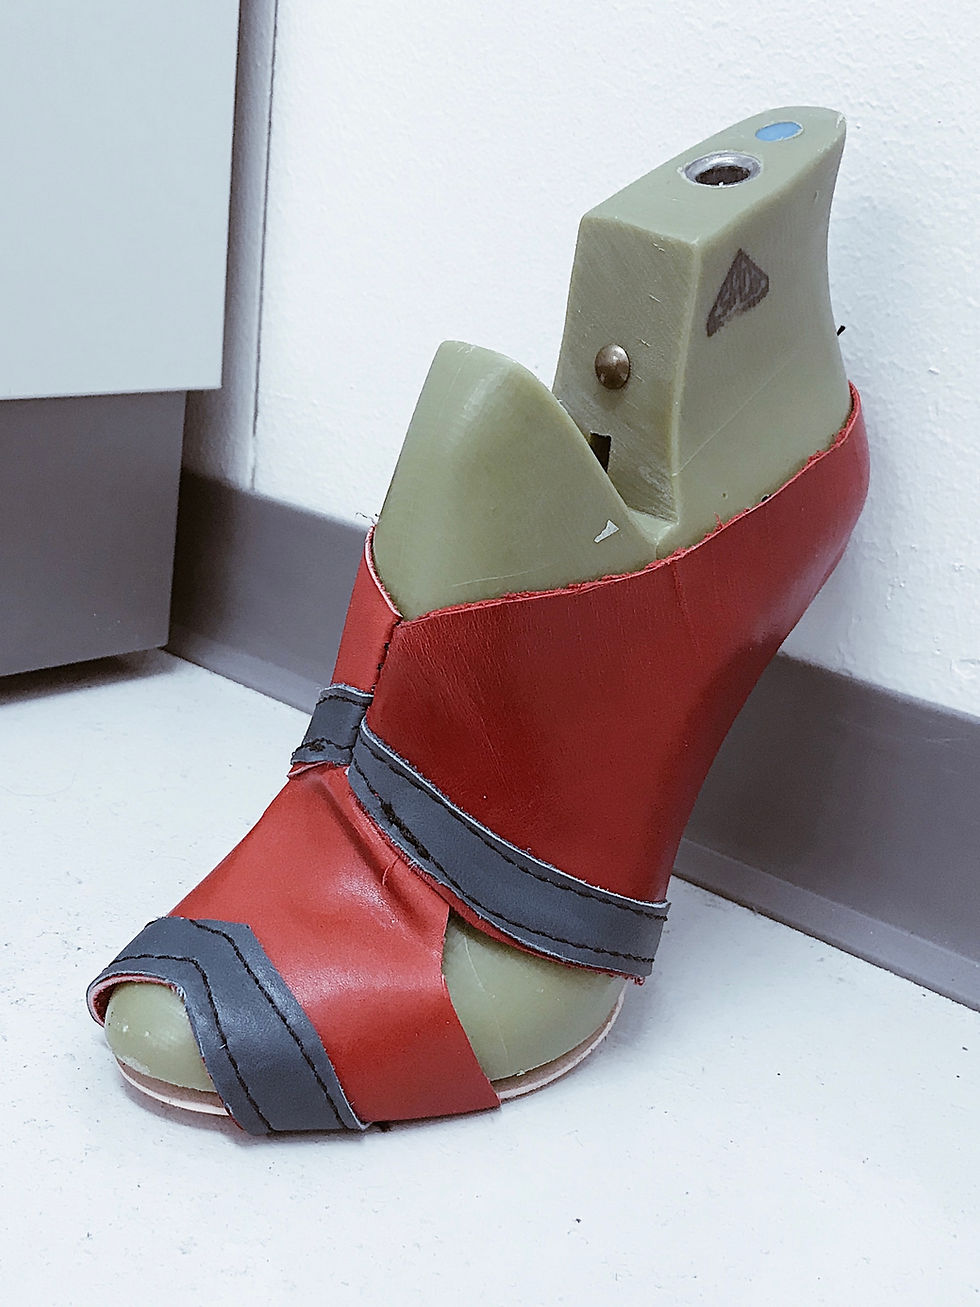
One time we also had to create an idea for a shoe using an inspiration picture of a model walking in Versace catwalk. Basicly, we were given some materials and time to do this mockup without patterns, just sewing things to a shape of the last.
But what is a mockup?
It is an idea for a shoe in 3D form. So, it is not a real shoe that you can wear but a presentation of ideas. Usually, designers use mockups to put out all the crazy ideas and colors into a 3D shape and then pick and choose what they like from it. So, the actual shoe often looks a lot different compared to the mockup and only has a few altered elements from the saturated and crazy mockup version. Our teacher also told us that sometimes people buy mockups to get new ideas and perspectives to their own designes.

DESIGNING A COLLECTION OF THREE SHOES
Brief for the assignment:
"Your task is to design a summery shoe collection for a customer with three ideas following trends for s/s 2020. The collection is to be designed using a product design process that has been chosen for this assignment. One of the model ideas will be transformed into a 3D form”.
(First, designing a collectioin is not that quick and easy as you might think but requires a lot of thought and trust to the process.)
Here's how I designed my first shoe collection at a university:
1. Costumer profile – Who is your client (colors, materials, hobbies, values etc.)
In this assignment we were our own clients. So I designed for myself.
2. Research – Trends (colors, materials, shapes, moods etc.)
3. Story of the colletion – What it's all about?
My collection is about nostalgia from the past decades because I love vintage clothing and history. These two things are what makes me most inspired and always gives me something to wonder about. I have always been facinated about the connection between past, present and future, so the story is all about sensing the past in present and how it affects the world today.
Here is the full story of my colletion:
NOSTALGIA
by Siiri Pakarinen
Did you know that it takes centuries for a star light to reach earth? Therefore, when we look at a sky full of stars at night we really are looking a light that is hudreds of years old. Without knowing we have been watching the past…
Even thought, we can look into the history with a light from the stars, a person is still a prisoner of her time. We are tied to present, to our destiny in our time. Not a single moment can be replaced, or a clock can’t be turned backwards… or can it?
This vintage themened collection offers an escape from the problems of the present day onto hazy, yellowing pages of history. Like the sky of stars it is an intersection of past and present where inspiration is sought, not from the diamonds of the sky, but from the immortal pearls of the earth: jewelry.
“Nostalgia -collection brings up memories from the golden decades of fashion when photographs were stored in albums, night clubs were smoky, rock stars were more famous and department stores were like wondrous oasisses. This time, before fever rising social media, has become a heady daydream like dream. A dream which we can see glimpses of in the twinkling stars, which we hear as an echo in the empty streets and which scent, a fusty combination of cigarettes and Chanel N°5, we can smell in the wind.”
4. Inspiration and theme – A lot of mood boards
My theme for the collection came from history: Vintage Vogue, Studio 54, Biba, power dressing etc. Basicly all the things I was interested at the time of designing this collection. Then my inspiration came from vintage jewellry as I have a love for big vintage clip-on earrings.
Thoughts on sustainability – How am I going to make a positive impact on the environment and what I choose to focus on?
There is no brand or product that is 100% sustainable when it comes to fashion. But what there is, is better products and brands. Everyone can make a difference but no one can do it all so the core question is, what is important for you? For me the most important thing is to create quality products that last. If I can make it happen with more sustainable materials and better ways of production then great, but quality comes always first.
Therefore my sustainable choises are:
1. Using quality materials that truly stand the test of time.
2. Creating somewhat timeless designes that are wearable for a long time.
3. Because my inspiration was vintage jewelry I could reuse vintage clip-on earrings as decoration on the shoes. This way you have pretty shoes but also something to wear on the ears if you wish. This also ties together with the story of the collection because you're carring a little piece of history.
5. First sketches based on the knowledge you have from your research of the costumer, trends, story, inspiration and themes – 50 sketches


6. More sketches – At least 20 developed sketches from the previous sketches


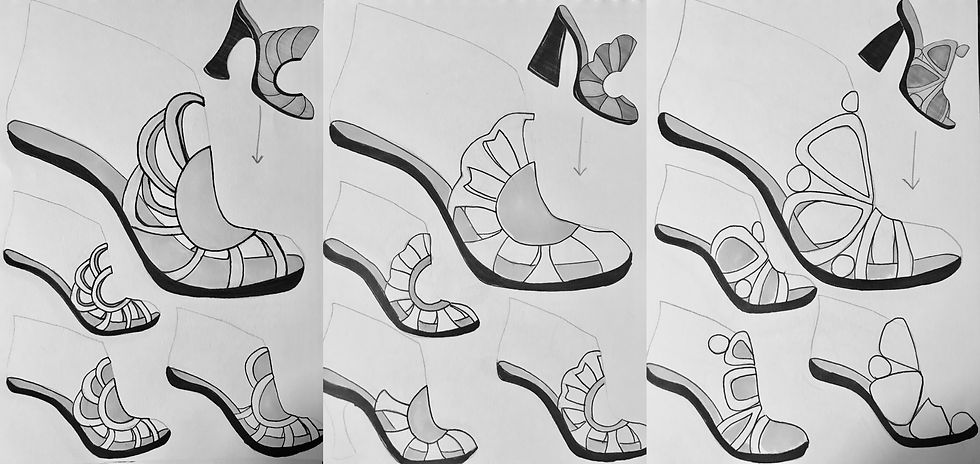
7. Choosing three styles for the collection

8. Drawing out the styles and deciding colors and materials.
9. Digital presentation of the collection.

10. Mockup from one of the styles – 3D presentation


When everything was finished I must say that I enjoyed more making mood boards and coming up with a story for the collection than sketching or devoloping ideas. Don't get me wrong, I did like the drawing part but I think, because I am not particularly happy with the collection other parts of the design process just felt nicer.
I am, anyways, having mixed feelings about the design process. On the other hand, I like that throughout the whole process you have no idea about the end resul until the very end. But what if you hate the end result? Then you have done all this work for products you don't even like. But what makes me even more angry is that I actually liked my idea and story but then I wasn't able to turn that story into a product that in my mind would strongly reflect my message.
This makes me second guess the big, old design process. Is it really that great? Could there be others ways to design? If I am not happy with what I see after using this process that everybody swears by can I ever succeed making anything great in the future? Or didn't I just try hard enough? Maybe I am just inexperienced? I mean, this is my first collection at a university, so I shouldn't expect greatness. Actually, this comes down to one of my biggest problems: I always expect too much from myself.

Entrepreneurship In Design
During this course we got familiar with entrepreneursip in design and people who work as entrepreneurs in this industry. Mostly, we discussed about possibilities in fashion business as well as thought about our own future when it comes to starting a business in fashion design. This means, we talked about branding our skills and turning them into interesting new businesses.
One of the biggest task during this course was to get to know and interview an entreprenour in the field of design. I interviewed a finnish leather goods designer Sanna Kantola from Lumi accessories. Sanna told me about her journey from starting her own business to what it takes to create a succesful fashion brand. Passion, unique products or services, networking and handling excellently cash and economy of the business rose to be the defining features of Sanna's busines mindset "If those four points are handeled well then the success is more likely to happen". If you're interested to know more about Lumi here's a link to their website: https://lumiaccessories.com
Thank you so much for reading!
Siiri


Comentarios